


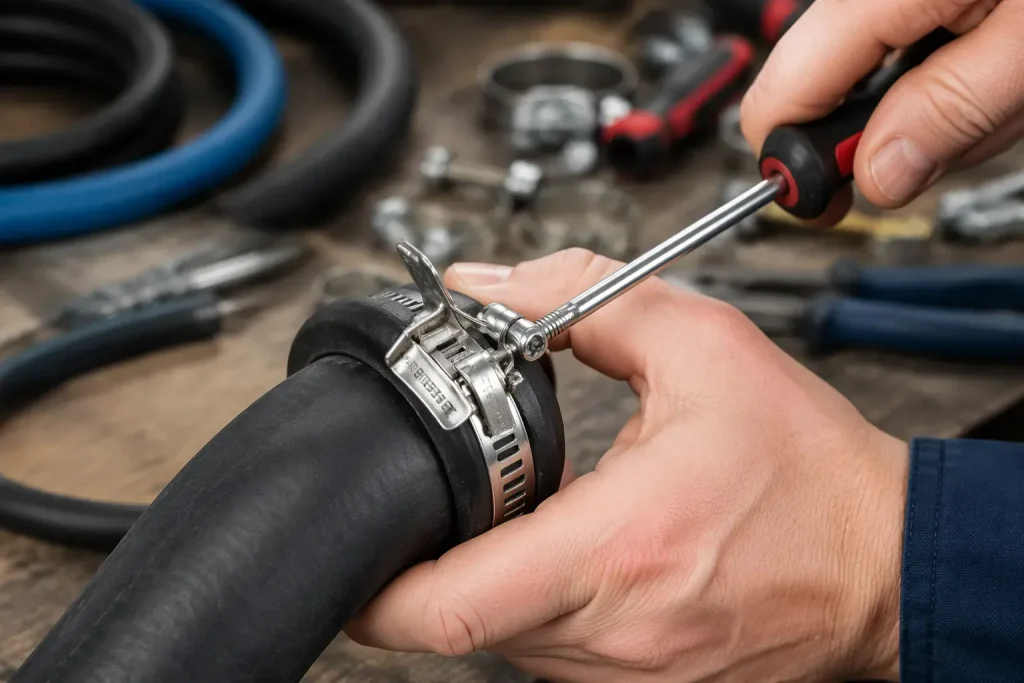
A loose abrazadera para manguera can usually be put back together rather than replaced, and the process starts with identifying the clamp type. Align the band with its housing, re-engage the screw or spring, then tighten until snug. Most abrazaderas de tornillo sin fin, Abrazaderas con perno en T, y abrazaderas de manguera de tensión constante reassemble in minutes with basic tools.
A binding clamp often needs a small fix, not a replacement. Check the band for bends and the screw for stripped threads, since a clean, straight band slides back into place easily. The hose should sit fully on the fitting before the clamp goes on. Tighten evenly and stop once the band grips the hose without crushing it, so a snug fit holds pressure without damage.
HWKG’s hose clamps take this further, backed by digital quality control and in-house R&D across worm drive clamps, T-bolt clamps, constant tension hose clamps, band clamps, and pipe couplings.This guide walks through identifying, realigning, and retightening a loose hose clamp step by step.
Puntos clave
- Identify your clamp type first: worm gear, spring, or T-bolt. Each type needs a different reassembly method.
- Align the band with its housing and engage the screw or spring. Tighten until snug, but do not crush the hose.
- Use the right tool for each clamp: a screwdriver for worm gear, pliers for spring, and a wrench for T-bolt.
- Fix minor issues like a binding screw or misaligned band before replacing the clamp. Clean threads and reseat the band.
- Replace any clamp with cracks, bends, or stripped threads. A new clamp is cheap and keeps your connection safe.
Instalar una abrazadera de manguera con engranaje helicoidal
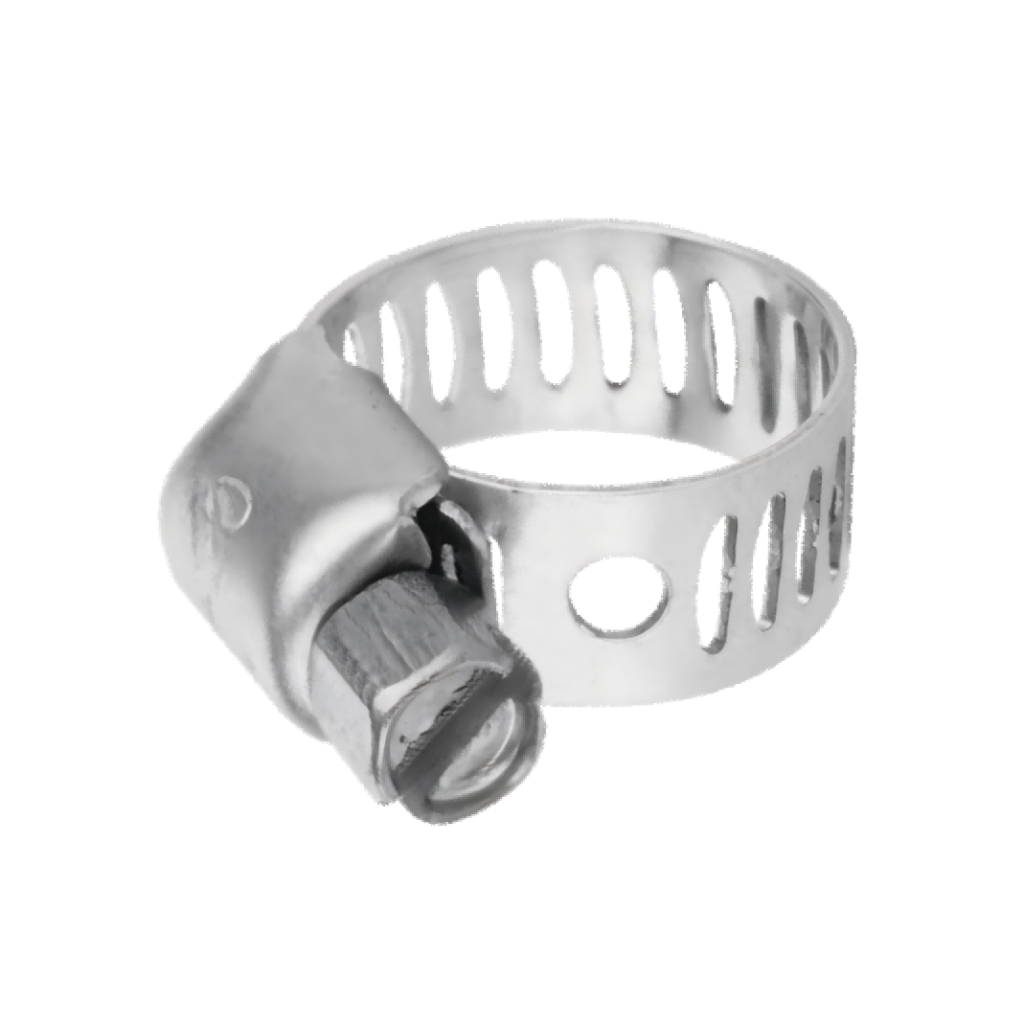
Worm Gear Hose Clamp Parts
Worm gear clamps are the most common type on the market, and they are the easiest to reassemble. Three parts make up the design. The band is a steel strip with slots or perforations cut along its length. The housing is the small block fixed to one end of the band. The captive screw sits inside the housing and cannot fall out. The threads of the worm gear screw mesh with the slots in the band. Turning the screw pulls the band through the housing and draws it tighter around the hose.
Many manufacturers build this style, and quality varies. As one good option among several, HWKG worm drive clamps use precision-perforated steel bands for high-torque fastening. Each unit is engineered for corrosion resistance and heat tolerance, which suits plumbing, automotive, and industrial systems. The company backs its clamps with over 20 years of manufacturing experience and a team of more than 50 engineers.
Step-by-Step Reassembly
A flat-head screwdriver is usually the only tool needed. Follow this sequence to install a worm gear hose clamp correctly:
- Turn the screw counterclockwise until the band fully opens. The band should move freely inside the housing.
- Slide the hose fully onto the hose fitting. Push until the hose end meets the stop on the fitting.
- Slide the clamp back up the hose and position it over the fitting serrations or barbs.
- Center the clamp on the fitting, then turn the head of the worm gear screw clockwise with the screwdriver.
- Tighten using the screwdriver until the band grips the hose firmly. Stop before the band digs into the rubber.
For barbed fittings, the clamp should sit over the full length of the insert. A clamp placed short of the barb can slip off under pressure.
Choosing the proper size worm gear hose clamp matters as much as the technique. Match the clamp range to the diameter of the hose at the fitting, not the hose in its relaxed state. A clamp that is too large will not secure the joint, and one that is too small will not close over the band.
If a part goes missing during the assembly, clamp kit packs with replacement components can help. These kits supply spare screws, housings, and bands, so a single lost piece does not force a full replacement. Keep a few kits on hand in a workshop or service van, and a small repair stays a small repair.
Reassemble a Spring Clamp
Identify and Gather Pliers
A spring clamp looks different from a worm gear style. It has no screw and no housing block. Instead, two steel tabs sit on the band, and the band itself acts as a spring. The metal stays under tension and presses inward on the hose at all times. This self-tightening design keeps constant pressure on the connection as the rubber expands and contracts.
Tool choice decides how smoothly the job goes. Standard slip-joint pliers can work, but they tend to slip off the tabs. A dedicated pair of spring clamp pliers grips the tabs squarely and holds the clamp open while the user works. Locking pliers with a curved jaw also work well for this task. Pick a tool that matches the tab spacing on the clamp.
Compressing a spring clamp stores real force in the band. Keep fingers clear of the tab edges and wear eye protection. A slipped tool can send the clamp snapping shut without warning.
Reset and Refit
The refit follows a short, repeatable sequence. Work slowly and keep a firm grip on the tool at every stage.
- Squeeze the two tabs together with the pliers. The band opens wider as the tabs move closer.
- Hold the clamp open and slide it onto the hose. Position it just behind the fitting.
- Push the hose fully onto the fitting until the end seats against the stop.
- Slide the open clamp over the fitting bead or barb.
- Release the pliers slowly. The band closes and locks onto the hose.
Check the seating after release. The clamp should sit square on the hose, with the band flat against the rubber. A tilted clamp leaves a gap on one side and weakens the seal. Squeeze the tabs again and shift the clamp if it sits crooked. Test the joint with a light pull on the hose before restoring pressure.
Reassemble a T-Bolt Clamp
Parts and Tools
A T-bolt clamp uses four parts. The band wraps around the hose. A bolt with a T-shaped head hooks into a slot on one end of the band. A nut threads onto the bolt, and a spacer sits between the band ends. Turning the nut draws the band ends together. The T-head stays captured in its slot, so the bolt cannot spin free during assembly.
This design suits high-pressure applications. Heavy-duty bolt clamps from HWKG deliver uniform clamping force through welded construction, which is one solid option among several on the market. A manufacturer with over 20 years of experience and more than 50 engineers builds these units for demanding lines. A socket wrench or nut driver handles most sizes. A torque wrench helps on critical joints.
Rethread and Tighten
Reassembly starts with the band. Slide the bolt head into the slot at one end of the band until it seats flat. Fit the spacer between the two band ends, then thread the nut onto the bolt by hand. Hand-tightening first prevents cross-threading. If the nut binds, back it off and start again with the threads aligned square.
Next, slide the hose fully onto the fitting. Position the open clamp over the fitting bead, then run the nut down with the wrench. Draw the band down evenly on both sides so the clamp stays square. Stop once the band grips the hose firmly. Overtightening crushes the hose and distorts the band, and it rarely improves the seal. Check the gap between the band ends after the final turn. A small, even gap on both sides shows a balanced fit.
Fix Common Hose Clamp Problems
Stripped Screws, Slipped Bands
Not every problem calls for a replacement clamp. A binding worm gear screw often frees up with a small correction. Back the screw out completely, wipe the threads clean, and check the band slots for debris or rust. A dry screw can drag inside the housing. A drop of light oil on the threads restores smooth travel. Reinsert the band squarely and turn the screw by hand first. Hand pressure reveals binding early, before the threads suffer damage.
A misaligned band causes most slow leaks. The band may sit crooked on the hose, or one edge may ride up on the fitting bead. Loosen the screw, reseat the band flat against the rubber, and tighten again. The band should cross the fitting serrations at a right angle. A tilted band leaves a narrow gap that weeps under pressure.
Stripped screw threads need a closer look. Light damage at the screw tip sometimes allows a fresh grip deeper in the housing. Run the screw in past the damaged section and test the hold. Heavy stripping leaves the worm gear unable to pull the band tight. At that point, a replacement screw from a kit pack solves the problem at low cost.
Repair or Replace
Some damage rules out reuse. Inspect the clamp before every refit and replace it when any of these signs appear:
- Cracks anywhere in the band or housing
- A band bent out of its curve
- Threads worn smooth on the screw or the band slots
- A spring clamp that no longer snaps back to shape
A cracked band can fail without warning under pressure. A bent band cannot seal evenly around the hose. Worn threads slip at the worst moment. A new clamp costs little and removes the risk. Keep a few spare sizes on hand, and a failed joint becomes a quick swap instead of a roadside delay.
Vibration and pipe movement call for different hardware. As one option among several, HWKG offers band clamps with EPDM rubber cushions that absorb vibration and protect pipes, plus pipe couplings for flexible, leak-proof connections on cast iron, PVC, and steel lines. This manufacturer backs its range with over 20 years of experience and more than 50 engineers. Match the hardware to the job, and every connection holds.
The universal method works on nearly every style. Identify the clamp type, align the band with its housing, engage the screw or spring, and tighten until snug. Snug means firm contact without crushing the hose. Position the clamp over the barbs or serrations, then inspect the hose connection for leaks before restoring full pressure. Spring clamps demand eye protection, since the band stores force and can snap shut.
Readers should match each step to their clamp type rather than forcing one method onto another. Any clamp that looks cracked, bent, or stripped has reached the end of its service life. Replace it, and the joint stays reliable.
Preguntas frecuentes
Can a hose clamp be reused after removal?
Yes, most clamps work again after removal. Inspect the band for bends and the screw for worn threads. A straight band and clean threads allow reuse. Replace any clamp with cracks or stripped threads.
How tight should a clamp be?
Tighten until the band grips the hose firmly. Stop before the band digs into the rubber. A snug fit holds pressure without damage. Overtightening crushes the hose and distorts the band.
What should a user do when the screw will not turn?
Remove the clamp, back the screw out completely, and wipe the threads clean. Check the band slots for rust or debris. A drop of light oil restores smooth travel. Reinsert the band squarely and turn the screw by hand first.
Does clamp position on the fitting matter?
Yes. Seat the clamp over the fitting barbs or serrations, not short of them. A clamp placed short of the barb can slip off under pressure. Center the band and keep it square to the hose.