


A abrazadera de manguera de liberación rápida secures a hose to a fitting and lets the user open it again without tools. Installation takes three steps: place the clamp over the fitting, flip the latch or lever down, and tighten the screw until the band holds the hose tight. Done correctly, it delivers a secure, leak-free connection—and it comes off and goes back on in seconds, which is why DIYers and professionals both rely on it.
HWKG’s quick release clamps take this further, pairing a tool-free latch with a stainless band built for heat, vibration, and long service, and the same range covers abrazaderas de tornillo sin fin, Abrazaderas con perno en T, band clamps, and pipe couplings for other jobs. This guide walks through installation, release, and removal, plus how to match the right clamp to each connection.
Puntos clave
- Install a quick release hose clamp in three steps: slide it on, flip the latch, and tighten the screw.
- Release the clamp safely by relieving pressure first, then lift the latch or loosen the screw.
- Choose the right clamp size by measuring the hose outside diameter and adding a few millimeters.
- Inspect clamps regularly for wear and replace any with bent bands or worn latches.
- Quick release clamps save time on jobs that need frequent changes, while traditional clamps cost less upfront.
What Is a Quick-Release Hose Clamp
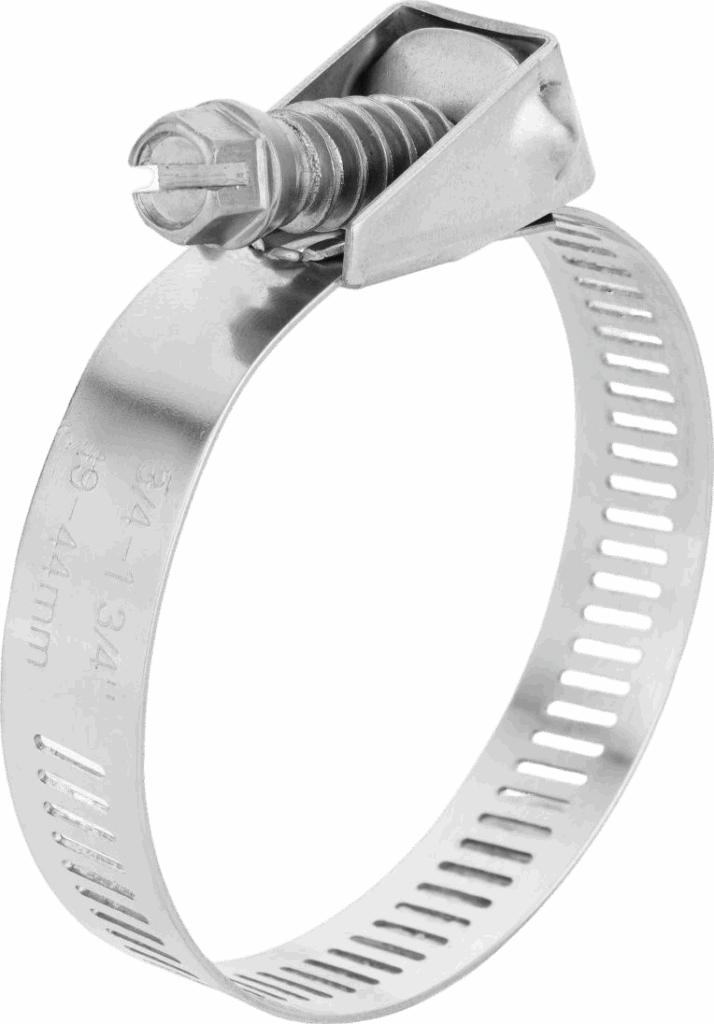
Cómo funciona
A quick release hose clamp holds a hose on a fitting using a band, a latch, and a tightening part. The band wraps around the hose. The latch or lever locks the band in place. Then a screw or cam tightens the grip. This quick release mechanism lets a worker open the clamp by hand and close it again in seconds.
The design stays adjustable across a range of fittings. A user sets the diameter once and reuses the same clamp on the same joint many times. Materials that resist corrosion let these clamps work indoors, outdoors, and in marine settings. For saltwater work, 316 stainless steel is the grade most often chosen because it resists chloride-induced pitting. Polymer-coated 316 stainless adds a physical barrier against moisture and chemicals. Zinc-nickel plating over carbon steel gives a cost-effective middle choice.
Common Types and Uses
Three styles cover most jobs. A snaplock worm drive style works for closed systems, where the clamp must come apart before it can go on. Lever-style clamps fit lines that change often. Band clamps with EPDM rubber cushions soak up vibration and protect soft pipes.
| Material | Relative Corrosion Resistance | Recommended Environment |
|---|---|---|
| Acero al carbono | Bajo | Dry, controlled environments |
| 430 Stainless Steel | Moderado | Indoor / mild industrial |
| Acero inoxidable 304 | Alto | General industrial, outdoor |
| Acero inoxidable 316 | Muy alto | Marine, coastal, saltwater, chemical |
Typical uses include automotive coolant hoses, fuel lines, and air intake systems. Water purifiers, bathroom fittings, garden irrigation, and marine setups also depend on these parts. A buyer should match the clamp type and size to the hose and the environment. HWKG, a manufacturer with over 20 years of experience, supplies worm drive, heavy-duty bolt, band, and pipe coupling styles so users can match the clamp to the job.
How to Install a Quick Release Hose Clamp
Prepara la manguera y el racor
Good installation starts before the band touches the fitting. Slide the clamp onto the hose first. This step keeps hands free and stops the band from trapping debris against the fitting. Clean the fitting next. Wipe away old sealant, rust, and coolant residue, then dry the surface. A clean joint lets the band sit flat and grip evenly.
Confirm the clamp diameter matches the hose. Measure the outside diameter of the hose with a caliper or tape, then add roughly 2–3 mm so the clamp slides over freely. Choose a clamp whose minimum diameter sits slightly below that number and whose maximum diameter reaches at least about 5 mm above it. A hose with an outside diameter of 28 mm, for example, pairs well with a 16–32 mm range. The minimum stays well below 28 mm, and the maximum leaves room to tighten.
| Hose Size (ID) | Typical OD Range | Recommended Clamp Size |
|---|---|---|
| 3/4″ (19 mm) | 1″–1-1/8″ (25–29 mm) | 5/8″–1-1/4″ (16–32 mm) |
| 3/4″ thick-wall hose | ~1-1/4″ (32 mm) | 3/4″–1-1/2″ (19–38 mm) |
A correct fit matters most when a user connects hoses of different sizes. Quick release clamps handle that job well when the diameter range covers the joint. A wholesale supplier can confirm ranges across a full catalog.
Position, Tighten, and Verify
Follow a fixed sequence for every joint. Position the clamp over the fitting and push the hose fully onto the barb. Flip the latch or locking clip down until it seats. Turn the screw until the band reaches the desired grip around the hose. Some styles need a screwdriver for final tightening; lever styles close by hand alone.
Verification protects the whole system. Tug the hose gently and watch for movement at the fitting. Check that the band sits flat and square, with no tilt or gap. Run a quick leak test before the system reaches full pressure. A slow drip at this stage points to a misaligned band or a loose screw, and both are easy to fix.
These steps apply to coolant lines, garden irrigation, and marine plumbing alike. Proper installation of quick release hose clamps takes under a minute per joint. Careful preparation and a steady tightening sequence deliver a seal that lasts. A factory that builds clamps to tight tolerances makes this routine easier to repeat.
How to Release a Quick Release Hose Clamp
Safe Release Steps
Pressure comes first. A worker must let out any pressure in the system before loosening the connection. Pressurized fluid can spray out. Follow this sequence:
- Check that the main control device, like the main mechanical valve at the pressure source, is closed, turned off, or disabled.
- Make sure the pressure control valves work right, because a leaking shutoff valve could let pressure back into the closed-off section.
- Lock out the main control device if a case-by-case review says it is needed.
- Find any other sources and places of stored energy in the system.
- Release stored energy from all system parts, and send any dangerous gas or vapor into a fume hood or local exhaust vent.
- Do disassembly or maintenance work only after stored energy is released.
Then lift the latch or lever to free the band. On a snaplock worm drive style, the screw is loosened until the band clears the fitting. A lever-style unit needs no tool at all. One hand can flip the quick release up and free the joint.
Safety gear matters during this step:
- Drain leftover fluid into a container placed under the hose connection, since fluid may stay in the hose and spill when you disconnect it.
- Wear protective gloves to guard against sharp edges or burrs on the clamp band and bolt head.
- Wear a face shield to protect against fluid splashes and flying metal bits during clamp removal.
Removal and Reuse
Slide the clamp back off the fitting. Check the band and latch for wear before reuse. Look for cracks, bending, and rust at the screw threads. A quick visual check takes seconds and stops a failed seal later.
Quick release hose clamps are made for repeated removal and reinstallation. Replace any clamp with a bent band, a worn latch, or a stripped screw. These parts cost little, and a fresh unit protects the whole assembly. A reliable manufacturer builds each batch to steady tolerances, so a replacement matches the original fit. Buyers who order in bulk from a wholesale supplier can keep spares on hand for routine service.
Some technicians try a DIY wire-clamp conversion on older fittings. The method removes the adjustment bolt, cuts about 1 inch from each wire, and bends the ends into hooks. Purpose-built clamps are more reliable, and the wire trick suits only temporary repairs.
Proper release technique protects both the worker and the hardware. Relieve pressure, disengage the latch, and inspect before storage. These habits keep every joint serviceable for years.
Tips for a Secure, Leak-Free Connection
Torque Guidance
Using the right torque keeps the hose and the clamp safe. Technicians should check the manufacturer’s spec for each hose clamp style and hose material. Worm drive clamps and band clamps each have their own limits. A torque wrench takes the guesswork out of critical joints. Hand-tightening works for lever-style clamps on low-pressure lines. Every hose clamp needs a clean fitting.
Overtightening damages hose clamps and standard clamps alike. Two risks matter most.
| Risk | Explicación |
|---|---|
| Hose Damage | Tightening too much squeezes and crushes the hose, which weakens its structure and makes it more likely to leak, crack, or fail under pressure. |
| Reduced Clamp Effectiveness | Over-tightening can bend the clamp out of shape (like stripped threads or a warped band), which hurts its ability to hold a steady seal and leads to slow loosening and leaks. |
A crushed hose may crack under pressure. A warped band loses its grip over time. Either problem can end in a catastrophic leak, where the hose comes off completely. Tightening with care helps stop fluid from leaking out and protects the hose. Replace worn hose clamps early. A hose clamp works best on a dry surface. These clamps hold a steady grip.
Inspection Checklist
A short inspection routine catches problems early. Check band alignment first. The band should sit flat and square, with no tilt. Confirm full latch engagement next — the locking clip must seat firmly on lever-style clamps. Look at the hose surface for cracks, swelling, or cuts near the fitting. Check hose clamps for bent bands. Replace clamps with worn latches.
Re-check every joint after the first heat cycle or pressure test. Heat makes rubber expand, and clamps that felt tight when cold may loosen. A second pass brings back the tight seal. Corrosion-resistant construction helps performance stay reliable indoors, outdoors, and in marine environments. Store spare hose clamps in a dry place.
Match the clamp size to the hose before installation begins. Measure the outside diameter, then pick a range that covers it. Picking the right size supports a leak proof seal. Quick release clamps reward this care during release and reuse. Heavy-duty bolt clamps suit high-vibration lines. HWKG, a hose clamp manufacturer, supplies hose clamps in bulk for wholesale buyers.
Quick Release Hose Clamps vs. Traditional Clamps
Performance and Fit
Each design works best for a different kind of job. Quick release hose clamps are great when a technician needs fast removal without tools and makes frequent changes. Traditional worm drive clamps are better for high-torque fastening, with precision-perforated bands and one-piece housings that hold a firm grip. A screw-type unit needs a screwdriver or wrench to tighten it. A quick release unit opens by hand, which speeds up any job that involves repeated adjustment.
Application fit decides the choice. Quick release clamps work well for joints that change often and for connections between hoses of different diameter. Heavy-duty bolt clamps give even clamping force for high-vibration or high-pressure systems. Band clamps with EPDM cushions soak up vibration and protect soft pipes. Pipe couplings combine stainless bands with rubber sleeves for flexible, leak-proof connections. Clamp selection should also match the standards of the application, whether automotive, plumbing, or marine. A wholesale supplier can confirm which style meets a given specification.
Cost and Maintenance
The upfront price tells only part of the story. Quick release hose clamps cost more than worm gear styles, and traditional worm drive clamps remain a low-cost, reusable fastening solution. The table below sums up the trade-off.
| Tipo de abrazadera | Cost Characterization |
|---|---|
| Quick release hose clamps | More costly than worm gear hose clamps |
| Traditional worm drive clamps | Economic, reusable fastening solution |
Repeated service changes the math. A crew that opens the same joint often saves time on every quick installation and removal, and that saved labor makes up for the higher purchase price. A one-time job on a budget favors the traditional clamp.
Maintenance routines stay about the same for both designs. Inspectors should check hose clamps for damage or wear throughout their service life. Replace any clamp with rust, cracks, a loose connection, hose indentations, brittle tubing, leaks, or a compressed hose that limits flow. Quick release clamps are reusable and great for frequent inspection, and their swivel-lock screw toggle latch keeps the screw end secure when open. A factory with steady quality control makes these checks predictable. HWKG builds hose clamps in several styles for wholesale buyers.
Hose Clamp Maintenance and Troubleshooting
Routine Maintenance
A quick check now and then keeps every joint working well. Look at each clamp every time you do service. Wipe off dirt, coolant residue, and salt buildup from the band and screw. Make sure the latch moves freely and clicks firmly into place. A sticky latch often means corrosion, and a quick cleaning makes it work smoothly again.
Keep spare hose clamps in a dry spot. Moisture harms threads and band edges over time. Keep a small supply of common sizes on hand, and label each bin by its range. A factory that ships in bulk makes stocking easy for wholesale buyers. Regular checks take only minutes and stop most failures.
Common Problems and Fixes
Slow leaks come from a few familiar causes. The table below lists each one with its fix.
| Common Cause of Slow Leak | How to Fix It |
|---|---|
| Loose clamp that lost its grip over time | Relieve pressure, clean the hose end and fitting, reposition the clamp behind the barb, and tighten until the hose compresses slightly |
| Softened or degraded rubber hose | Replace the hose and the clamp together |
| Overtightening that cuts into the rubber | Tighten only until the hose just begins to bulge, then stop |
| Wrong size clamp | Measure the hose outer diameter and match the clamp range |
| Clamp seated on top of the barb | Reposition the clamp behind the barb |
A latch that will not engage usually means the band is not lined up right. Loosen the screw, square the band on the hose, and close the latch again. A slipping band means you should check the diameter and look at the hose condition. If leaks continue after a proper fix, run a pressure test.
HWKG keeps quality steady through digital control, including temperature chambers, high-pressure testers, and spark detectors. The manufacturer also offers custom designs for special applications.
Using a quick release hose clamp the right way is simple. Get the hose ready, put the clamp in place and tighten it, check for leaks, then release it correctly when you need to. This routine gives you a leak-free hold, fast removal without tools, and a long service life. Matching each clamp type to the job matters just as much. Lever styles work well for frequent changes, while heavy-duty bolt clamps hold lines that vibrate a lot.
Good habits protect every connection. Check hose clamps for wear before the next job, and make sure the band is lined up on all clamps. Look up the manufacturer’s torque specs for worm drive clamps and band clamps. Keep spare hose clamps in a dry place. These small steps keep installation smooth and every release safe.
Preguntas frecuentes
Do quick release hose clamps need tools?
Most lever-style clamps open and close by hand. A snaplock worm drive style needs a screwdriver for final tightening. The latch does the locking work either way. Users save time on every joint that changes often.
How does a user pick the right size?
Measure the hose outside diameter, then add roughly 2–3 mm so it slides on freely. Pick a range whose minimum sits below that number and whose maximum reaches above it. A supplier can confirm ranges across a full catalog.
Can these clamps handle marine and outdoor use?
Yes. Corrosion-resistant grades work well in wet and salty places. Grade 316 stainless resists chloride pitting, and polymer coatings add a barrier against moisture. These hose clamps hold up indoors, outdoors, and on boats.
When should a user replace a clamp instead of reusing it?
Replace any unit with a bent band, a worn latch, or stripped threads. These hose clamps are built for repeated removal, yet worn parts fail without warning. A factory with steady quality control makes replacements match the original fit.
Do quick release clamps cost more than traditional styles?
They cost more upfront than worm drive clamps. Repeated service changes the math, since every tool-free removal saves labor. High-vibration lines still favor heavy-duty bolt clamps. Wholesale buyers should match the style to the job, and HWKG supplies several types for that purpose.