






To correctly install a T 型螺栓软管夹, first remove the nut, wrap the clamp around the hose, and position it approximately 1/4 inch from the hose end. Next, insert the bolt and hand-tighten the nut. For spring-loaded clamps, back off the nut two full turns from the position where the spring coils are fully compressed (touching). Finally, use an inch-pound torque wrench to tighten the clamp to the manufacturer’s specified torque value. This method prevents overtightening while ensuring an effective seal.
主要收获
- Position the clamp 1/4 inch from the hose end. Hand-tighten the nut.
- For spring-loaded clamps, turn the nut back two full turns. Start from the coil-solid position.
- Use a torque wrench. Tighten to the manufacturer’s torque specification. This prevents over-tightening.
Understanding T-bolt Clamps
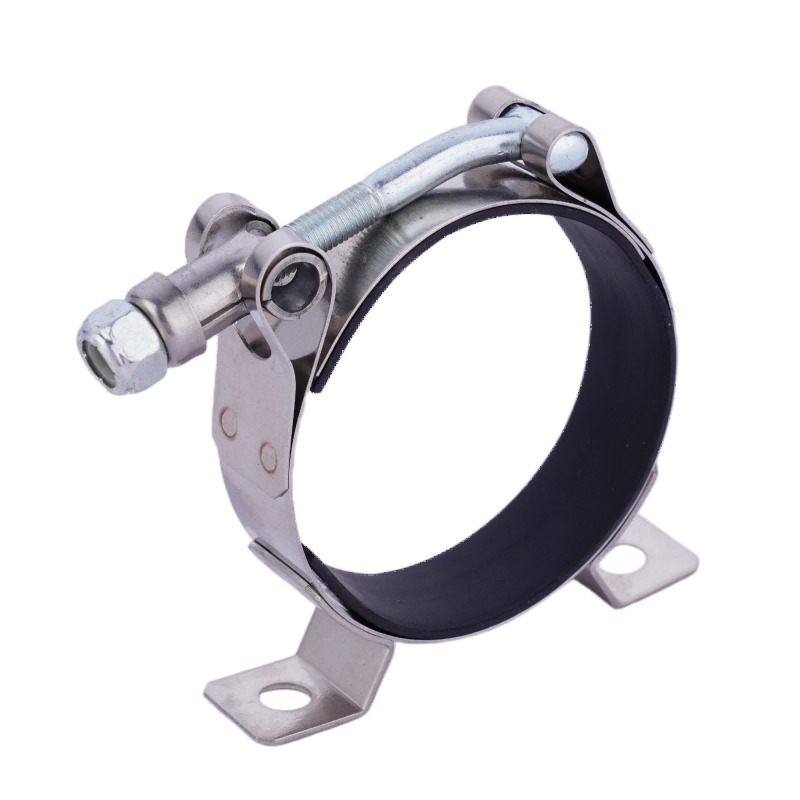
Comparison of Standard and Spring-Loaded Clamps
T-bolt clamps generally fall into two main categories. Standard T-bolt clamps provide strong, uniform clamping force suitable for heavy-duty applications, performing exceptionally well in environments with minimal vibration and displacement. They are commonly used in large machinery, industrial plant equipment, and agricultural machinery. Their robust bands ensure a secure hose connection that resists loosening.
Spring-loaded T-bolt clamps (also known as constant-tension clamps) offer distinct functional characteristics. They maintain consistent clamping pressure even amidst temperature fluctuations. This design is frequently required for automotive turbocharger intake hoses, where engine heat causes thermal expansion and contraction; the integrated spring automatically compensates for these dimensional changes. Self-locking nuts prevent tension loss or loosening during operation. This feature is particularly critical in high-vibration environments, where standard clamps might otherwise loosen over time.
Reputable manufacturers typically produce both types of clamps using stainless steel. HWKG offers corrosion-resistant products designed for harsh operating environments; its product range includes bolt clamps, band clamps, and pipe couplings. Compliance with industry standards such as ISO 9001:2015 ensures dimensional consistency across production batches, while AISI standards govern the material grades of the stainless steel used.
| 特点 | Spring-Loaded T-Bolt Clamp | Standard T-Bolt Clamp |
|---|---|---|
| 抗振动性 | Self-locking nut + spring-loaded design absorbs vibration | Fixed clamping force; may not compensate |
| Thermal expansion | Automatically compensates for expansion/contraction | No automatic compensation |
Why Correct Installation Matters
Putting the clamp on correctly decides if it works well. Wrong placement or too much tightening can damage the hose, cause leaks, or make the whole connection fail. A clamp placed too close to the hose end seals poorly. Overtightening crushes the hose material and bends fittings.
Correct installation also protects the parts connected by the hose. A tight seal stops fluid loss and dirt from getting in. Following the maker’s torque specs makes sure the clamp applies the right force. This method makes equipment last longer and cuts repair costs. People who know these steps get reliable results every time.
Installing T-bolt Hose Clamps
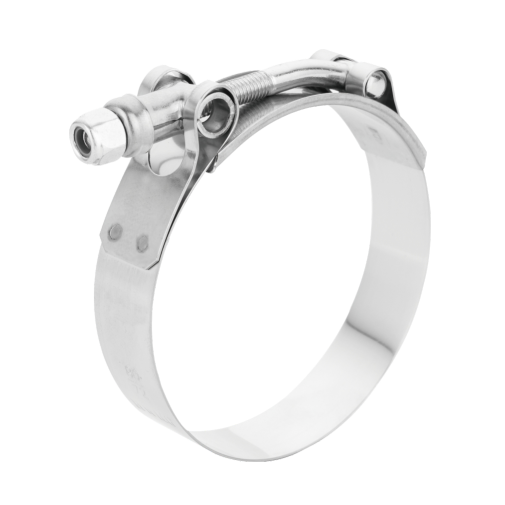
Positioning and Manual Pre-tightening
Proper installation begins with accurate positioning. The clamp band should be placed approximately 1/4 inch (approx. 6.35 mm) from the end of the hose. This ensures the clamp sits behind the first barb or rib of the fitting. For larger hoses, this distance may need to be increased to approximately 3/8 inch (approx. 9.5 mm). Maintaining this distance ensures a secure hold without damaging the hose.
The installer first removes the nut and then wraps the clamp around the hose. The clamp band should not overlap the edge of the hose, as this would compromise the seal. Next, the bolt is inserted through the mounting hole, and the nut is reattached. Manual pre-tightening follows; this step is intended to snug up the clamp band without applying the final tightening force.
Torque specifications depend on the bolt size. Torque values differ between metric threads and imperial sizes. A 6 mm thread requires 20 Newton-meters (Nm) of torque, an 8 mm thread requires 22 Nm, and a 10 mm thread requires only 5 Nm. Imperial sizes follow a different standard: 1/4-inch bolts require 11 foot-pounds (ft-lbs), 5/16-inch bolts require 22 ft-lbs, 3/8-inch bolts require 39 ft-lbs, 1/2-inch bolts require 94 ft-lbs, and 3/4-inch bolts require 333 ft-lbs.
Adjusting Spring-Type Clamps
The installation method for spring-type clamps differs. After manual pre-tightening, the installer must back off the nut by two full turns from the position where the coils are fully compressed (closed). This method generates the appropriate tension to accommodate thermal expansion and contraction.
A feeler gauge can also be used to check the gap. The installer checks the spacing between the middle coils; the standard gap is approximately 0.022 inches (approx. 0.56 mm). This tiny gap ensures the spring functions correctly.
The “two-turn” rule is based on the principle of thread pitch. For example, a 1/4-28 thread advances a specific distance with each rotation; two full turns create the appropriate gap, allowing the clamp to accommodate temperature fluctuations. A torque wrench is required for the final step of both types. Installers must tighten the clamp according to the specifications in the table above to ensure a correct installation. Following these steps guarantees a reliable seal every time. Proper installation protects both the hose and the connected components. A correctly installed clamp offers a longer service life and performs better under load.
Common Mistakes with T-bolt Clamps
Avoiding Over-Tightening
Tightening too much is the biggest mistake people make. Many think more force means a better seal. That is not true. Too much torque hurts the hose and clamp.
Silicone hoses get damaged in several ways when someone tightens too much:
- The clamp cuts into the silicone and leaves a groove that leaks under pressure.
- Hose material gets pushed past the clamp edges, which can cause sudden blow-off.
- Inner layers get damaged, which weakens the hose from the inside.
- The hose stays deformed, so the seal fails even after loosening the clamp.
Over-tightening squeezes the hose and clamp past their limits. This causes stress cracks and thinner hose walls. These cracks do not show up right away. They appear weeks later when temperatures change. In time, they cause leaks or bursts.
A torque wrench stops these issues. For example, a 4-inch stainless steel T-bolt clamp needs 65 in-lbs for the best seal. Follow the maker’s spec to protect the connection.
Verifying Seal Reliability
Always check the seal after installation. First, inspect for leaks by observing for fluid seepage under operating pressure and listening for the sound of escaping air while the system is pressurized.
Check the installation position. The clamp band should be located approximately 1/4 inch from the end of the hose; improper positioning can compromise the seal. If the clamp band overlaps the edge of the hose, it creates a weak point.
For spring-style clamps, check the gap to ensure proper tension. There should be a visible space between the center coils. Use a feeler gauge to verify the gap is approximately 0.022 inches; this clearance allows the clamp to accommodate temperature fluctuations.
Ensure the clamp is not twisted on the hose. A twisted clamp band exerts uneven pressure on the hose, which can lead to leaks over time. Proper alignment ensures optimal clamp performance.
Finally, re-inspect all clamps to detect any issues early. Check the gaps, confirm there are no leaks, and verify clamp positioning. This process takes only a few minutes but can prevent costly failures down the line.
Proper installation needs the right position, hand-tightening, and a final torque check. Tightening too much is the most common mistake; a torque wrench stops this harm. Good stainless steel clamps from HWKG work reliably. Always follow the maker’s steps and check the setup for leaks.
常见问题
Can T-bolt clamps be reused after removal?
Standard T-bolt clamps can be reused provided the band is neither worn nor deformed; spring-loaded clamps are also reusable. Inspect the threads and the band before use; replace the clamp if any damage is found.
Is a torque wrench required for every installation?
Using a torque wrench ensures the most reliable installation. If a torque wrench is unavailable, spring-loaded clamps can be installed using the “back off two turns” method, whereas standard clamps require precise torque to prevent damage. Experts recommend using the appropriate tools for installation.
When should T-bolt hose clamps be replaced?
Replace the clamp if you observe rust, band cracking, or stripped threads; replacement is also recommended after removing a clamp from a damaged hose. Regular inspections help detect issues early. High-quality stainless steel clamps manufactured by HWKG offer a longer service life in harsh operating conditions.